
Fall mums make a beautiful addition to your garden. Mums are perennials so make sure you provide the right conditions for them to thrive. They will produce more flowers if they're planted earlier in the season, but if you plant them too late they won't have the time to establish a root system and will be unlikely to survive harsh winters. You will get the best results by planting your mums in spring. Give them lots of water. To keep your mums bushy, make sure to pinch back any newly sprouted shoots. A bushy plant will yield more flowers.
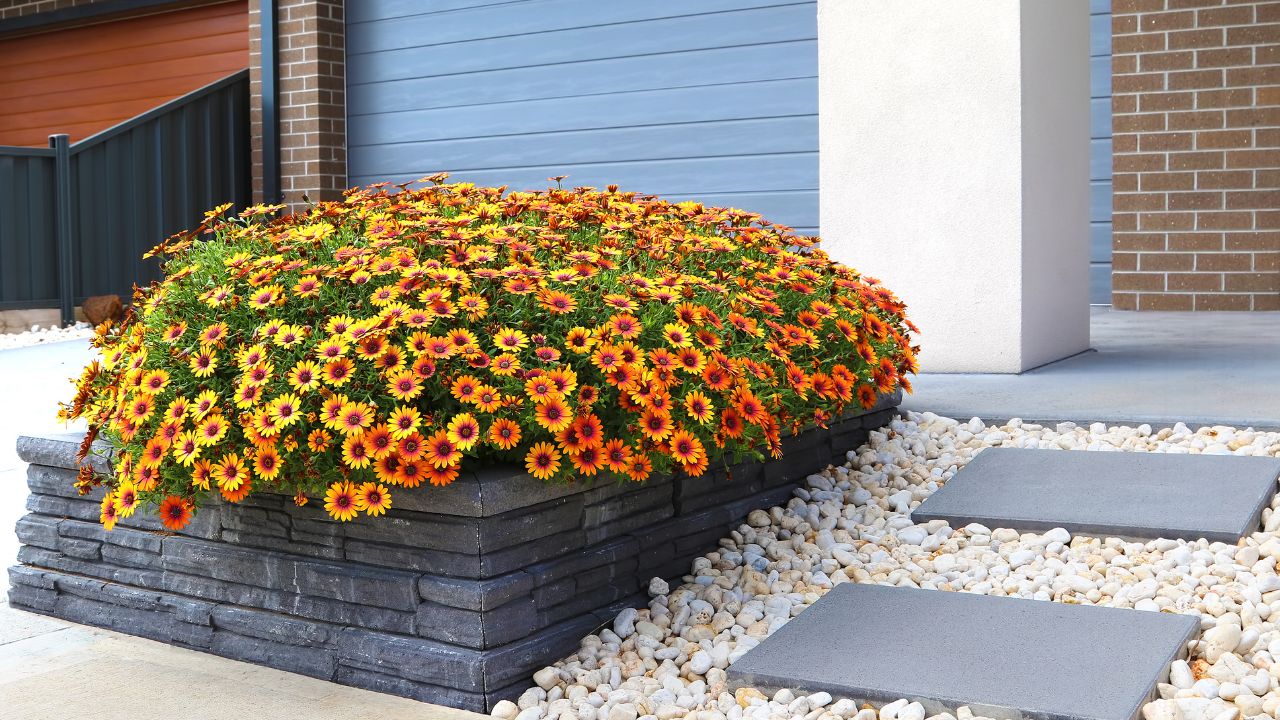
Potted mums
You can still plant mums inside containers in the autumn. However, it is important to ensure that they are provided with the best growing conditions. They thrive in soil with good drainage and a high level of organic matter. If you notice that your mums' roots are too big, you can split them and transfer them to a larger container. Your mums should be buried until the frost has gone. Otherwise, they may not survive the cold weather.
For mums to be happy, choose a place that gets plenty of sun indirect and well-drained soil. Mothers can't tolerate excessive dryness so be sure to place them in a spot with at least six hours of sunshine each day. Also, make sure you water them often. They need approximately 1 inch of water every week.
Potted Mums are a wonderful way to add fall color to your outdoor spaces once they're in bloom. You can grow them in your garden as a cut flower or in your border plants for sunny locations. They can also be planted as perennials. Mums can be planted as perennials.
Plant potted mums in an area that gets six hours of sunlight each day. A saucer will catch any water runoff and keep soil moist. You must water your plants daily after they have been planted in a pot. You can also mix potted mums with decorative gourds, pumpkins, and cornstalks.
Mums are thirsty plants. It is vital to provide them with plenty of water and sun each day. You should water potted mums early in the day to avoid drying the leaves. You can stop them from flowering in a hot area.
Potted Mums are easy-to-care for and available in many sizes and colors. Potted mums are cheap and last for several weeks if properly cared for. Many people simply throw away their potted mums after they bloom, but with a little TLC, potted mums can live for years and look gorgeous.
Transplanting mums
Mums are the perfect autumn flower, and can easily be cultivated using cuttings. It's easy to move cut plants from one location into another with a few simple steps. First, remove the leaves on the bottom of the mum. Next, place the cut in a small container of good-quality soil. To encourage regrowth, dip the cutting in a rooting hormone. After the cutting has become roots, transfer it to another pot or garden.
Mums are perennials. They prefer well-drained, rich soil. Remember to divide mums when you transplant them. This will allow the roots to grow naturally. If you're growing mums inside containers, wait until the frost danger is gone before transplanting. They should be kept indoors, otherwise they will freeze.
Mums need at minimum six hours of sunshine per day. Potted mums need good drainage in order to avoid wilting. You can amend the soil with organic material if it is clay-rich. You should water your plants every day. They will not need fertilizer for the first few months. However, in the fall, they will need to be fertilized with Schultz fertilizer. Till they can thrive outdoors, fertilize the plants monthly with a Schultz fertiliser. Mulch can also be done to protect your plants.
Mums that are perennial should be divided every 2-3 years. When new growth begins in spring, divide them. Take out the center of the clump to separate the vigorous, new shoots. You can fertilize your new shoots by using slow-release, granular floral fertilizer. You can also pinch back mums once they're about six inches tall to encourage compact growth.
If you're planting mums in pots, plant them before the first frost. They should be placed in a sunny location with well-drained earth. Then, water them. Regular watering throughout the winter will ensure they remain healthy and beautiful for a long period of time.
After you have transplanted the plant, make sure it gets at least six hours of sunlight every day. Mums need plenty of sunlight for their flowering process. Avoid planting them too early in the spring or summer because they won't survive in summer temperatures.
Before flower buds are formed, feed mums
Mums are heavy eaters and require high levels of nutrients during plant development. Therefore, feeding them early is essential to ensure strong growth. It is important to test the soil regularly to determine the appropriate fertilization rate. If the soil EC levels are high, mums won't be able to absorb enough nutrients. The EC level should be low to ensure that mums get enough nutrition.
Each mum should be separated every three to five years. If the mothers are too small, or have oddly-shaped mums, it's time to divide them. Their centre roots will become older and more woody while their roots outside will grow younger and stronger. It is possible that the mums need to be separated if they haven't become fuller and rounder in the last two years. The new moms will not grow properly without adequate roots.
Feeding fall mums before flower buds develop is important in the early spring. Mums that are kept standing will survive the coldest winters much better than mums that are trimmed to the ground. Mulch is essential for protecting roots and retaining moisture. When new growth starts, it is important that you remove the dead stems. This will encourage the development of the habit by encouraging more flowers to bloom.
Mums do best in full or mostly sun but tolerate a little shade. Shaded mums may become weaker and fall when their flower buds develop. Mothers who live in areas that have warmer climates will do better in partial shade. But mums who are shaded will grow taller than moms who are in full sunshine.
It is important to pinch any mums that have been planted in the ground. This will encourage the growth of more stems. If you do not pinch mums before midsummer, you will not get any flowers.
Overwintering mums

Although overwintering mums can be done easily, it is crucial that you select the best type for your environment. Garden mums are true perennials and can grow in most zones from 5 to 9. The first step is choosing a type. Choose a plant which will bloom in autumn and survive the winter.
Winter is coming and mums need protection from harsh weather. Standing water can lead to roots freezing and dying. It is a good idea to plant mums near a structure which can protect them from the strong winter winds. Mum foliage will become brown once frost has settled.
Water your mums regularly. Water your mums regularly, but not just on the foliage. By doing this, the plant will have time to dry between waterings. Mulch will also help conserve water and protect roots from extreme cold.
While it's easy to overwinter moms in pots it does require some effort. Mothers should be kept in a cool, dark place between 32 and 55 degrees Fahrenheit. You can place your mums in a heated basement or closet if you live somewhere cold, but you should not expose them to temperatures below freezing.
Mothers can make beautiful spring blooms, but they must be protected from frosty weather in the winter. You can plant them outside again once they reach this point. They are perennials and require proper care to ensure they continue to flower and grow year after year.
If you want to successfully overwinter your mums, planting them early is key. To ensure that they can withstand the winter, it is important to plant them before the first frost. Plant mums with buds so that their root system can develop. Straw mulch or burlap can also be used to protect your mums.
Mums should be planted in spring to allow them to enjoy the full growth season. It will allow them enough time for roots to develop and bloom in the spring. This will ensure they have the best chance of surviving winter.
FAQ
When to plant herbs
Plant herbs in spring when the soil temperatures are 55 degrees Fahrenheit. To get the best results, they should be planted in full sun. To grow basil indoors, place seedlings in pots filled with potting mix and keep them out of direct sunlight until they sprout leaves. Once plants start growing, move them into bright indirect light. After three weeks, you can transplant them to individual pots and water them every day.
How do you prepare soil for a vegetable gardening?
It is simple to prepare soil for your vegetable garden. You must first remove all weeds from the area you wish to plant vegetables. After that, add organic material such as composted soil, leaves, grass clips, straw or wood chips. After watering, wait for plants to sprout.
Which is the best layout for a vegetable garden?
The best vegetable garden layout depends on where you live. Plant vegetables together if your house is in a busy area. If you live in rural areas, space your plants to maximize yield.
What length of time can I keep an indoor flower alive?
Indoor plants can survive for many years. To ensure new growth, it's important that you repot indoor plants every few years. Repotting is easy; simply remove the old soil and add fresh compost.
Statistics
- According to the National Gardening Association, the average family with a garden spends $70 on their crops—but they grow an estimated $600 worth of veggies! - blog.nationwide.com
- Today, 80 percent of all corn grown in North America is from GMO seed that is planted and sprayed with Roundup. - parkseed.com
- According to a survey from the National Gardening Association, upward of 18 million novice gardeners have picked up a shovel since 2020. (wsj.com)
- It will likely be ready if a seedling has between 3 and 4 true leaves. (gilmour.com)
External Links
How To
Organic fertilizers for your garden
Organic fertilizers are made with natural substances like compost, manure, seaweed extract and blood meal. The term "organic" refers to using non-synthetic materials in their production. Synthetic fertilizers include chemicals used in industrial processes. They are widely used in agriculture because they provide nutrients to plants quickly and efficiently without requiring laborious preparation methods. However, synthetic fertilizers pose a risk to the environment and our health. They also require large amounts energy and water to make. Synthetic fertilizers also pollute surface and groundwater through runoff. This pollution can be harmful for both wildlife and humans.
There are several types of organic fertilizers:
* Manure is a product of livestock eating nitrogen-rich food (a plant nutrient). It has bacteria and enzymes that help to break down the waste, resulting in simple compounds that are easy for plants to absorb.
* Compost - a mixture of decaying leaves, grass clippings, vegetable scraps, and animal manure. It is rich for nitrogen, carbon, potassium and magnesium. It is extremely porous and holds water well.
* Fish Emulsion - a liquid product derived from fish oil. It is similar to soap in its ability to dissolve oils and fats. It contains phosphorous, nitrogen, and trace elements.
* Seaweed Extract - a concentrated solution of minerals extracted from kelp, red algae, brown algae, and green algae. It is rich in vitamins A, C and iodine as well as iron.
* Guano is excrement from amphibians, seabirds, bats and reptiles. It contains carbon, nitrogen, phosphorous as well as potassium, sodium and magnesium.
* Blood Meal: The remains of animal carcasses. It is high in protein, making it suitable for feeding poultry and other livestock. It also contains trace mineral, phosphorus as well as potassium, nitrogen, and phosphorus.
Mix equal amounts of compost, manure, and/or fish oil to make organic fertilizer. Mix thoroughly. If you don't have all three ingredients, you can substitute them one for another. For example, if you only have access to the fish emulsion, you can mix 1 part of fish emulsion with two parts of compost.
To apply the fertilizer, spread it evenly over the soil using a shovel or tiller. About a quarter of a cup of the fertilizer is needed per square foot. You will need to add more fertilizer every two weeks until you see signs of new growth.